If there’s one thing–at least among my sphere of friends IRL and online–that’s unifying many of us during these weeks of shelter-in-place, it’s baking. Tons and tons and tons of baking. In the past decade, pre-quarantine, I may have baked brownies a handful of times, if that often. I’ve baked these brownies three times in the last few months. I’ve made oatmeal-chocolate chip-dried cherry cookies and gougères, in both cases baking only a fraction, freezing the rest of the dough in pre-portioned nuggets for baking on a whim over coming weeks. I even tried my hands at hamburger buns this week, not a bad first go. Some baking fiend it temporarily inhabiting my body.
Oh, but the bread. Inspired by a close friend who’s become extraordinarily dedicated to the art and craft of baking artisan breads, I’m right there with the influx of new home bakers. For most of my life, all-purpose flour was all I needed. I became enamored with buckwheat flour in recent years. But today? Today, I have grocery-story all-purpose and whole wheat flours, Bob’s Red Mill rye flour, and three flours from the fabulous Cairnspring Mills in Skagit Valley north of Seattle: Edison all-purpose, Expresso whole wheat and Trailblazer bread flour. I had to seriously reconfigure some cabinet space, but it’s working out.
I’m not here to talk about my bread exploits, as satisfying as they’ve been. Super-newbie status will keep me in learning mode there for quite some time. I’m here to talk about all that discard many of us have thanks to care and feeding of sourdough starter. Creative uses for the discard are working into our new culinary routines as well.
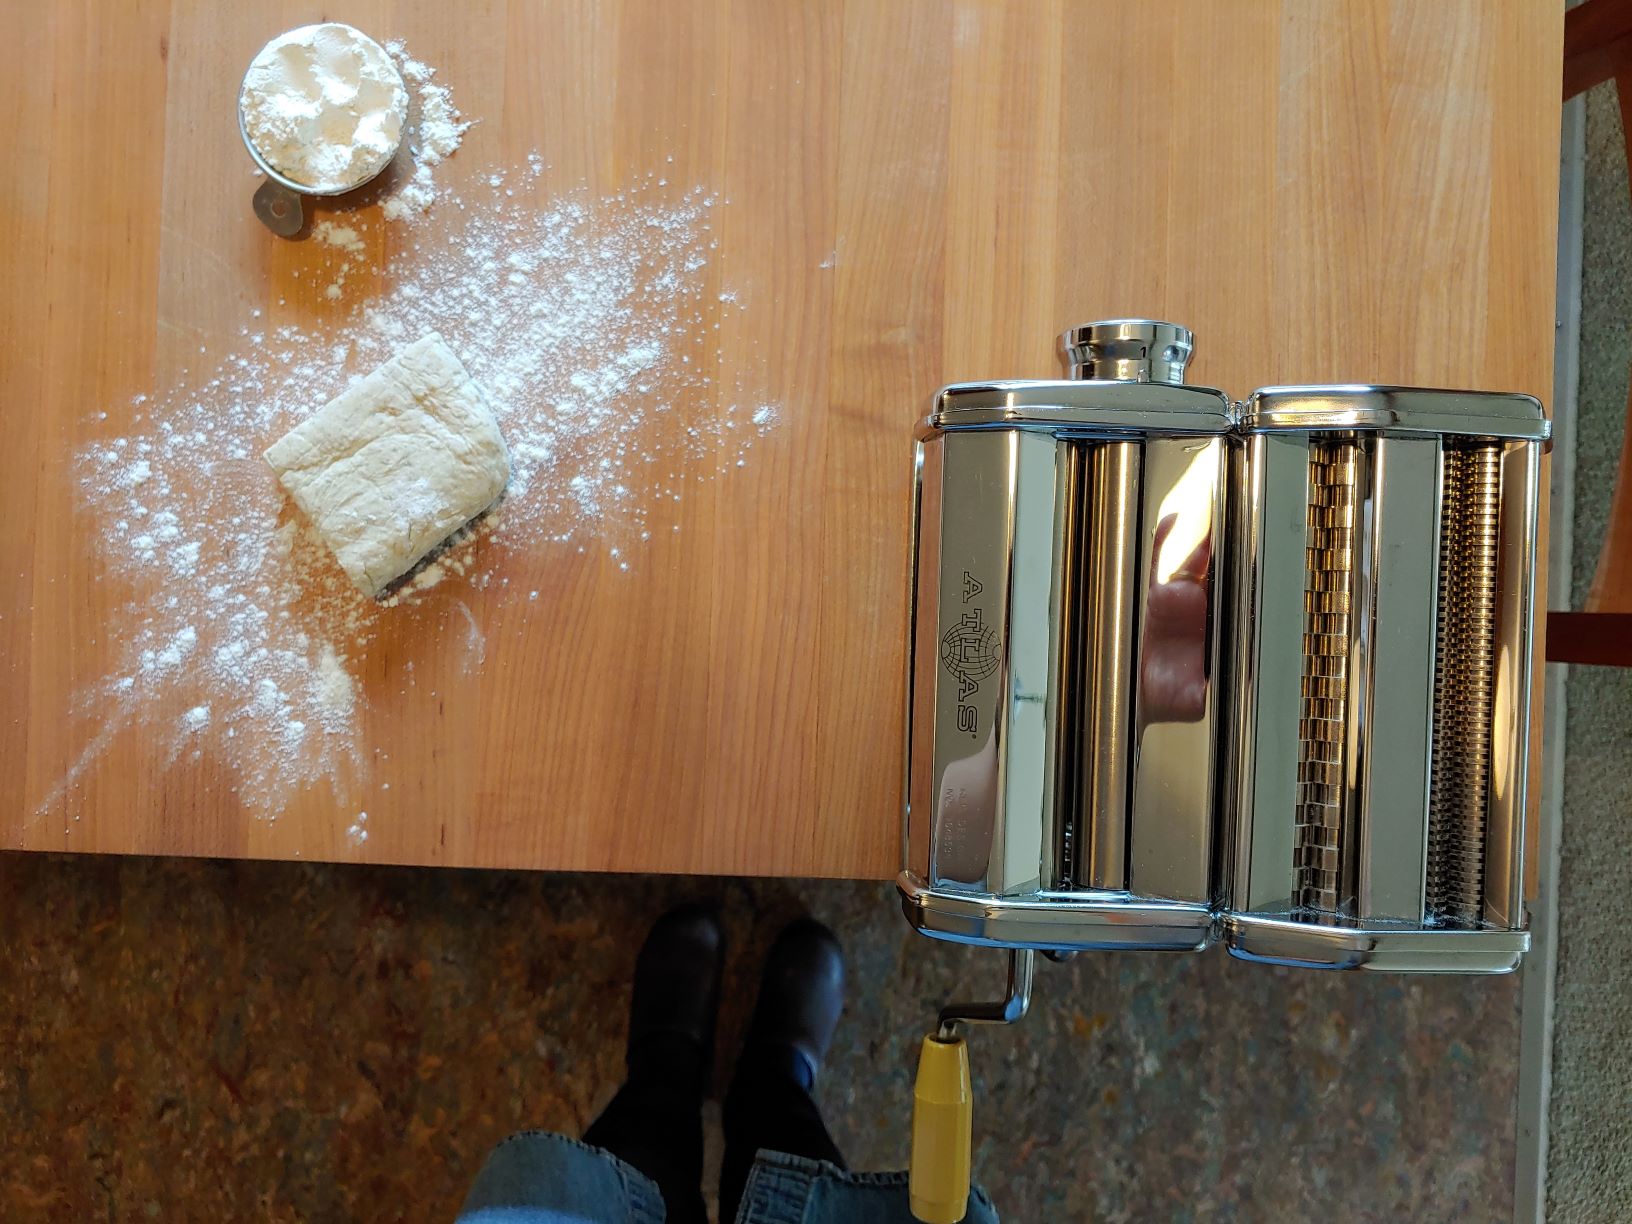
My ears perked up mighty quickly when someone mentioned making crackers with their discard. I’m a longtime devotee of all things salty-crunchy, enough so that I wrote Salty Snacks, which came out in 2012. Homemade sourdough was not in my repertoire at the time, so this was a new adventure I was happy to try. Every time I make crackers, I reach for a particular tool from my kitchen shelves. It makes a BIG difference in both how well the crackers come out, and how likely I am to make a batch of crackers on the spur of the moment. That cracker-making marvel is my pasta machine.
Pasta Machine Perks
I don’t remember where I originally heard the suggestion of rolling cracker dough in a pasta machine, I definitely didn’t dream it up myself. But once I’d give it a shot, I haven’t looked back.
On that first benefit I mentioned, how well the crackers come out, you have those solid, adjustable rollers to thank for creating sheets of even thickness. Even thickness helps assure even baking, always a plus for consistent results. Not just even, but thin too, for maximum crispness.
The second perk is just knowing how relatively quick it’s going to be to roll out and cut the crackers, whipping up a big batch in, what, an hour maybe? [I haven’t timed it start to finish, will loop back around after another go.] The size of the pasta rollers encourages widths of strips that are easy to work with compared with the more amorphous shapes the dough can take on rolled out by hand. Cranking the dough portions through 4 or 5 times goes quickly, so the whole process of rolling and cutting the dough for baking isn’t as daunting as it might seem.
Granted, it takes more time to set up your pasta machine than it does to take a rolling pin out of the drawer. Mine’s close at hand, I’ve got the perfect spot on my wood block and have done this often enough it takes mere moments. And, yes, yes, the cleaning up. Dough that’s not sticky (your cracker dough shouldn’t be sticky anyway) and lightly floured along the way will mean just brushing away flour before tucking back into the box. A dry pastry brush makes quick work of it, or a dish cloth or paper towel. For me, those extra gestures are very much worth the ease and consistency the pasta machine contributes overall.
The Steps
Whether pasta dough or cracker dough, the basic steps of the process are essentially the same. (I’m not sharing a specific recipe here, since I have yet to make sourdough crackers enough to have polished my own version. My first couple batches have started with this recipe from King Arthur Flour, following my whims as I go. After a few more batches and explorations, I may post a new recipe soon. I have 7 or 8 cracker recipes in Salty Snacks.)
Work with a small enough portion of dough that, after having gone through the incrementally thinner roller settings, will not be so wildly long that it’s hard to manage. Shorter strips will be much easier, especially as you get the hang of the technique. I usually work with one-quarter of the prepared dough at a time.
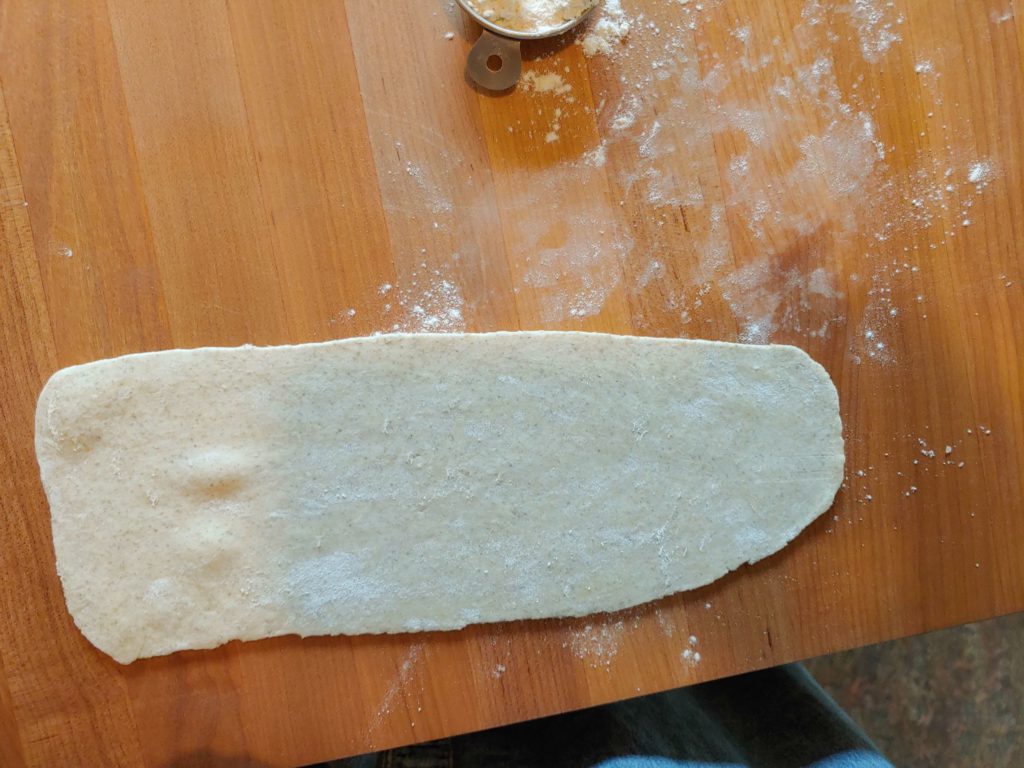
Be sure the machine rollers are at their widest setting to start. Press the dough portion out flat with the heel of your hand on a lightly floured surface, in a shape closely resembling a rectangle a few inches wide, a half inch or less thick. Feed the dough lengthwise through the rollers, laying the strip on the counter. Fold in the two ends overlapping a bit, which squares off those edges. Lightly flour the dough if needed and feed back through the same roller setting.
Now decrease the rollers to the next setting, and feed the dough strip back through. I generally just let the dough fall naturally into its little folded pile under the rollers, then quickly spread it out on the counter and check if a bit more flour is needed before passing the strip of dough through the machine again. Flour is your friend to avoid sticking, but don’t go overboard or the crackers will be quite dry.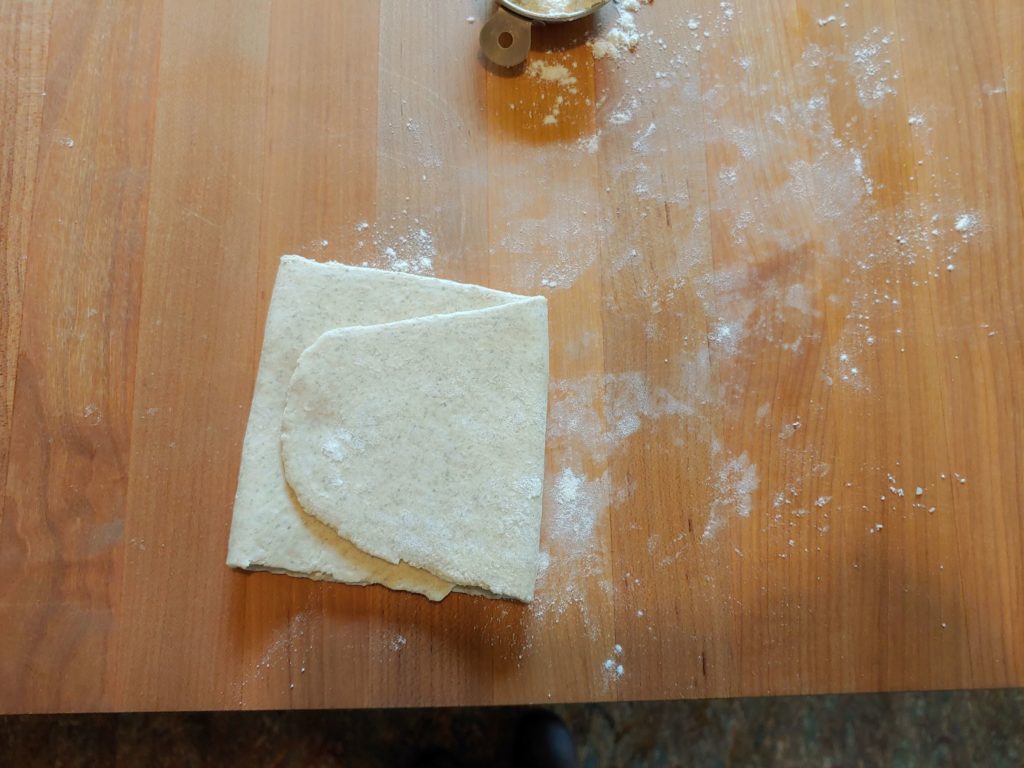
On my machine, I go down to setting 4, shooting for roughly 1/16th inch thickness. I’ve used the same machine for ages, the classic Atlas I think many have. Has served me very very well over the years. Sometimes even to make pasta. I’m not familiar with how similar the settings are on different brands, particularly electric machines.
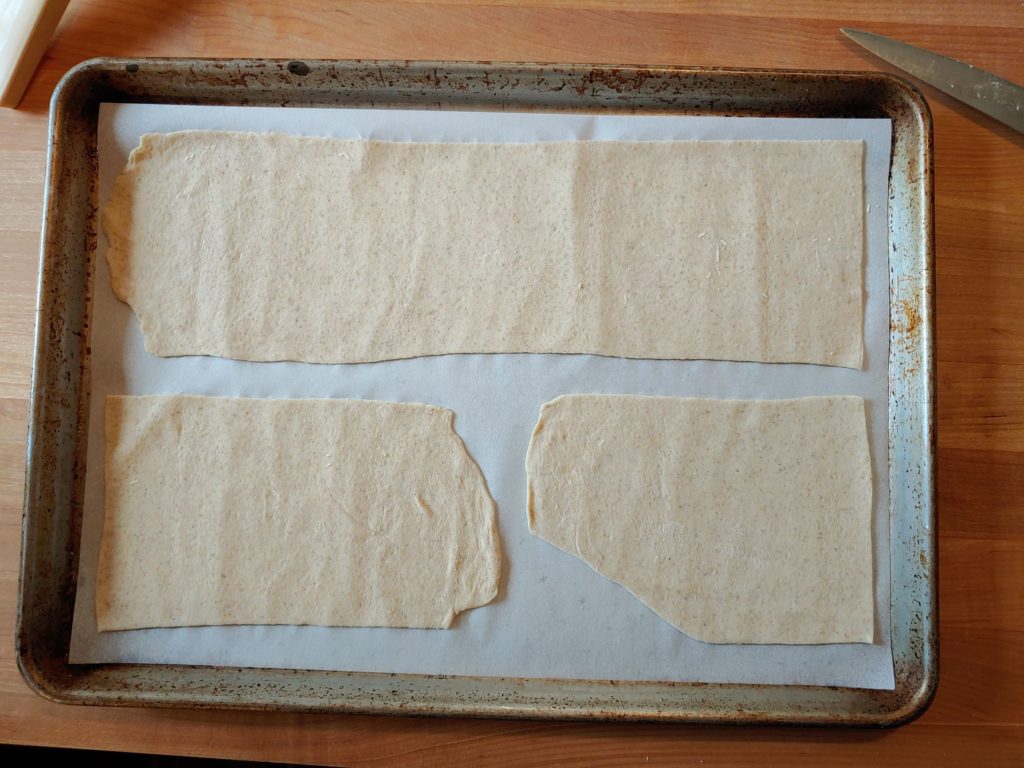
Transfer the dough strip to your parchment-lined baking sheet, lengthwise to one side, allowing the long end to drape over onto the counter (assuming your strip is longer than the baking sheet, which is likely). Use a rolling pastry cutter or sharp knife to cut the strip to fit the pan, laying the remaining piece in the pan alongside it. Repeat the rolling process with another portion of the dough and fill out the second half of the baking sheet with a portion of that dough.
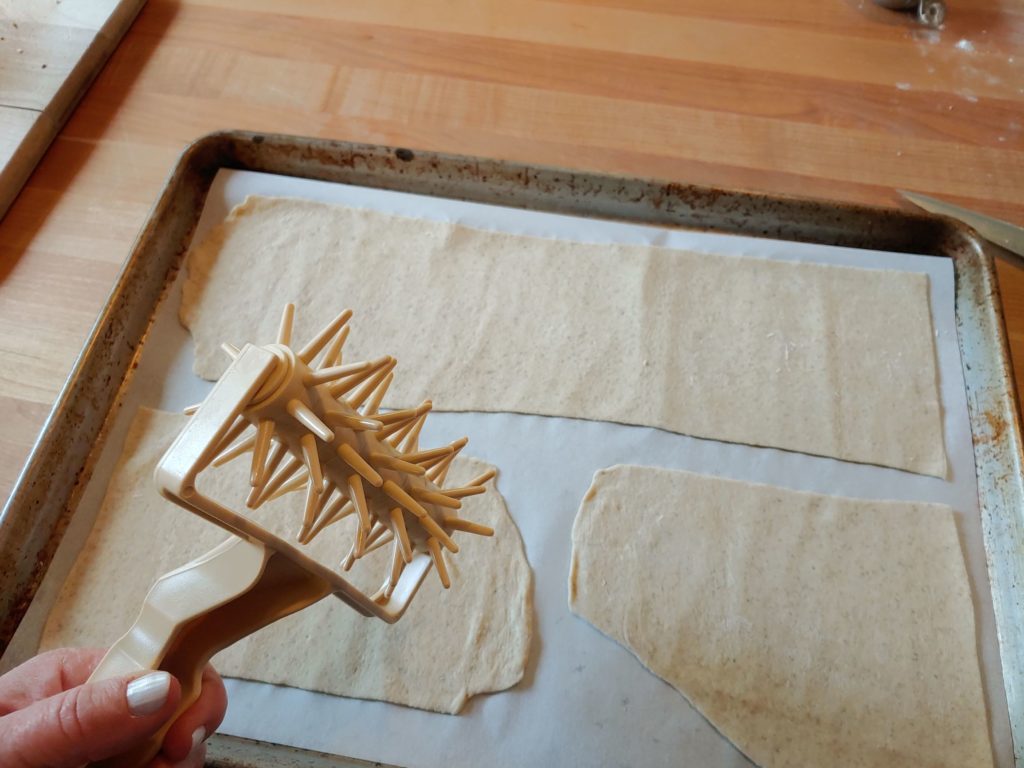
With the pan filled, use the tines of a fork to prick the dough all over, to limit puffing while the crackers bake. Unless you happen to have a dough docker, like I do. This is pretty much the only time I use that torturous-looking monster of a gadget, but it sure makes this step a breeze.
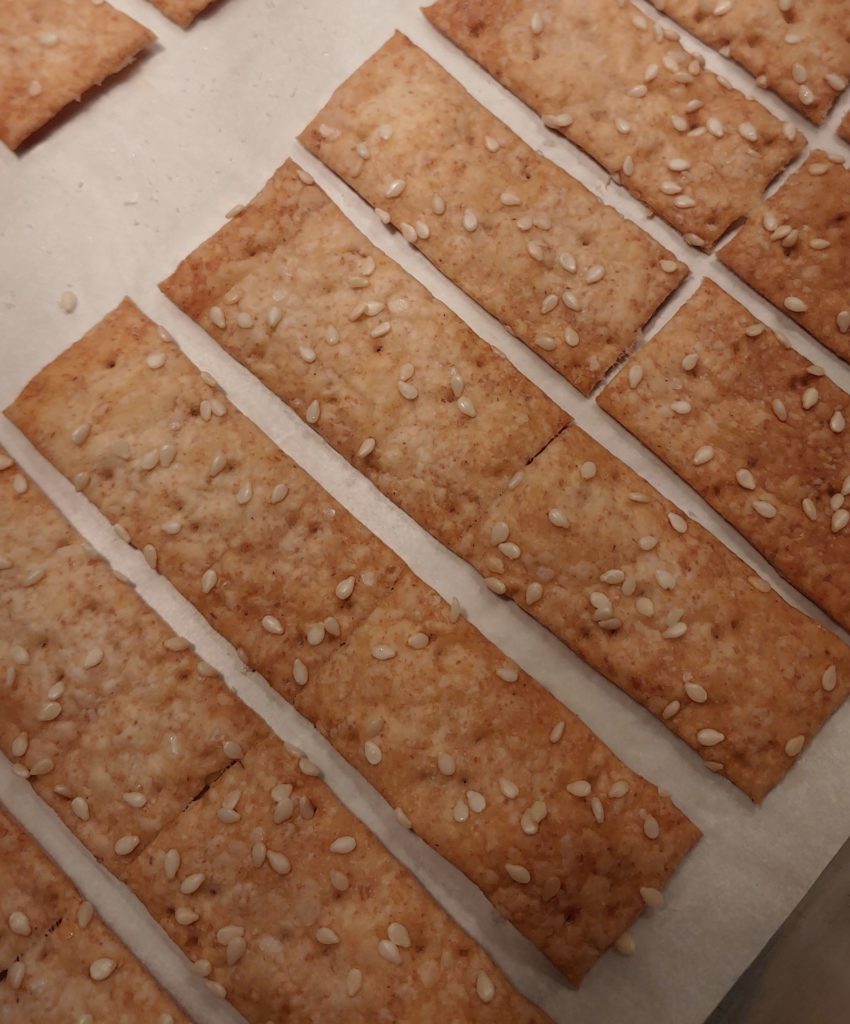
Then brush the top of the dough lightly with melted butter or water, and sprinkle with a bit of coarse salt and/or whatever topping you like (sesame seeds here, could be poppy, cumin, caraway, a spice mix like dukkah).
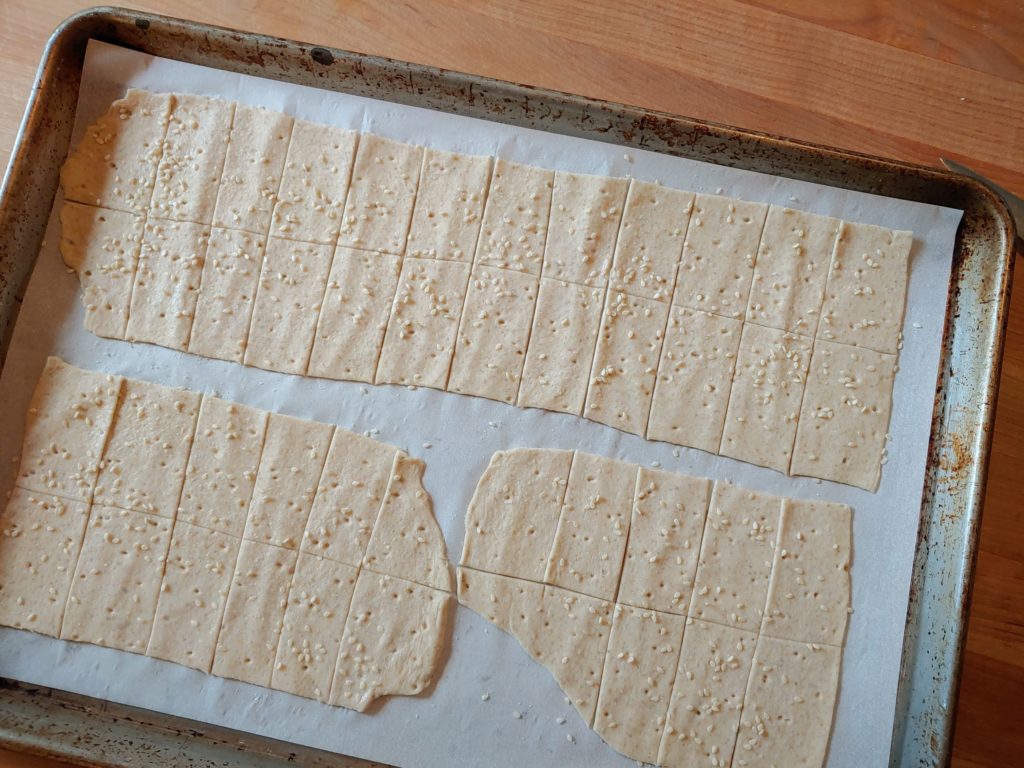
Use a rolling pastry or pizza cutter to cut the dough strips into whatever size you want. (You can do this with a knife too, but just press down with the blade, not drawing it laterally through the dough, which stretches it. A rolling cutter does this lickety-split.) I never fuss with measuring exactly, I’m rarely making crackers for a use that would require such finesse. Be just as fastidious as makes you happy. Bake and enjoy.